डिज़ाइनर्स के लिए AI Agents: Agentic Workflows को कैसे Design और Build करें
AI agent असल में क्या होता है, chatbot या copilot से कैसे अलग है, और तीन agentic workflows जो कोई भी designer बिना production code लिखे build कर सकता है।
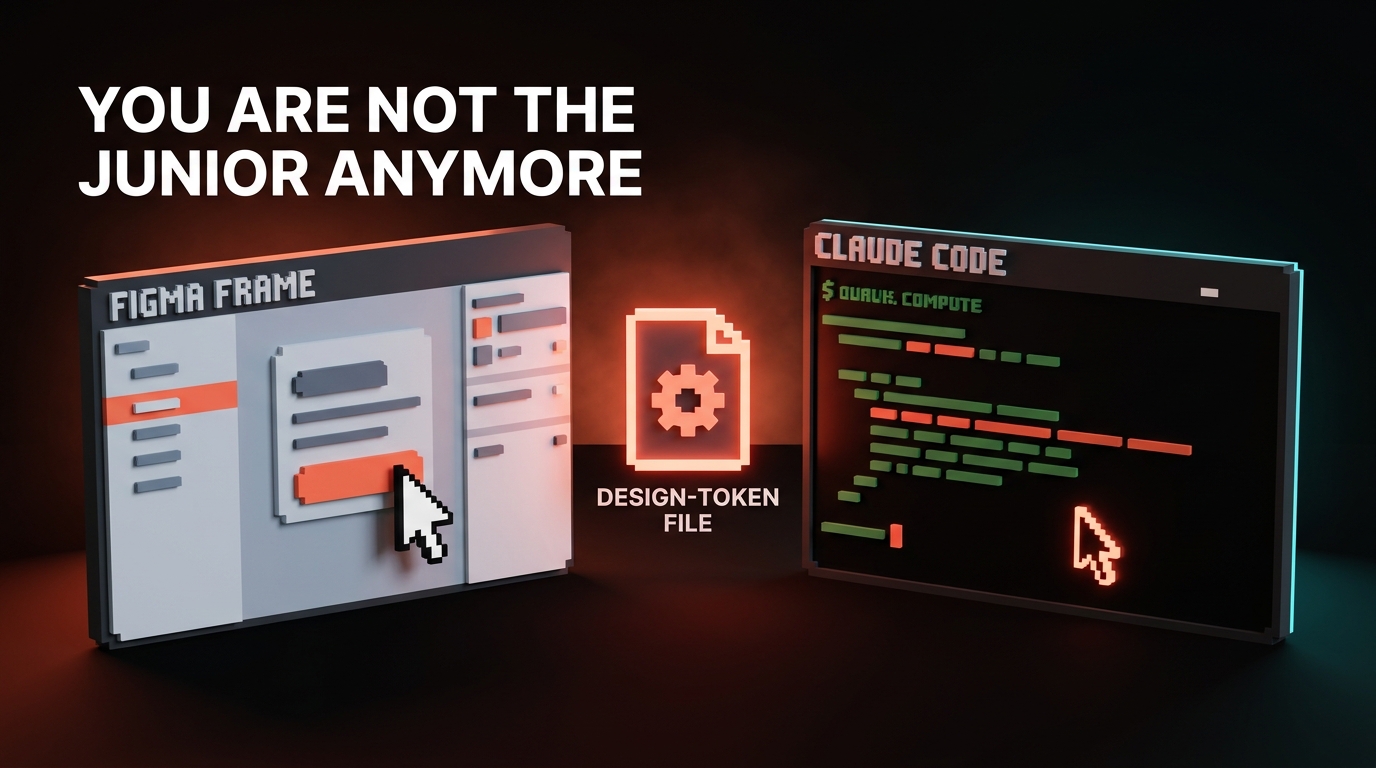
chatbot और agent का फर्क वैसा ही है जैसे एक junior का जो आपके अगले message का इंतज़ार करता है और एक junior का जो जाकर पूरा काम खत्म कर देता है।
वो दूसरा वाला पिछले अठारह महीनों में आपके tools में आ चुका है, और ज़्यादातर designers ने अभी तक नोटिस नहीं किया। वो chat window में prompts टाइप कर रहे हैं, जवाब copy कर रहे हैं, Figma में paste कर रहे हैं, और सोच रहे हैं कि उनका workflow 2023 का थोड़ा तेज़ version क्यों लग रहा है। agent shift "बेहतर ChatGPT" नहीं है। यह एक category change है।
एक agent को goal मिलता है। वो decide करता है कि कौन से tools call करने हैं। वो उन्हें order में call करता है, results पढ़ता है, course correct करता है, और आपको एक finished चीज़ सौंपता है। आप अब chat में typing नहीं कर रहे। आप एक छोटी team को briefing दे रहे हैं और deliverable review कर रहे हैं।
Chatbot, copilot, agent, और यह फर्क क्यों मायने रखता है
तीन शब्दों को ऐसे use किया जाता है जैसे उनका मतलब एक ही हो। नहीं होता।
एक chatbot turn-based होता है। आप पूछते हैं, वो जवाब देता है, आप फिर पूछते हैं। ChatGPT बिना tools के, Claude plain chat window में, Gemini app में। Context वही है जो आप paste करते हैं। Output text होता है।
एक copilot inline assistance है। GitHub Copilot, Figma के AI features, Notion AI। यह दूसरे tool के अंदर रहता है और आपके काम करते वक्त अगला move suggest करता है। यह अपनी lane नहीं छोड़ता। यह multi-step work plan नहीं करता।
एक agent goal-directed होता है। आप उसे अगला step नहीं, outcome देते हैं। वो खुद tools चुनता है, loop में उन्हें call करता है, अपनी progress check करता है, और तब रुकता है जब goal पूरा हो जाए या उसे आपके input की ज़रूरत हो। सबसे clear modern example है Claude Code जो आपके terminal में MCP servers के साथ चल रहा हो, हालांकि ChatGPT का agent mode, Cursor का agent panel, और Anthropic का Computer Use सब उसी तरह behave करते हैं।
| Mode | आप कहते हैं | वो करता है | कब रुकता है |
|---|---|---|---|
| Chatbot | "मेरे लिए एक headline लिखो" | Text return करता है | एक message के बाद |
| Copilot | Typing शुरू करें | अगली line suggest करता है | जब आप reject करें |
| Agent | "हमारे Button variants audit करो और एक consolidated API propose करो" | Code पढ़ता है, tests चलाता है, PR लिखता है, सवाल पूछता है | जब goal पूरा हो |
निचोड़: chatbots respond करते हैं, copilots assist करते हैं, agents deliver करते हैं।
एक agent एक loop है, single prompt नहीं
हर agent जो आप कभी use करेंगे वो एक ही चार-step cycle पर चलता है। इस shape को समझें और आप predict कर सकते हैं कि कोई भी agentic tool कैसे behave करेगा।
- Plan. Agent goal पढ़ता है और पहला step decide करता है।
- Act. वो एक tool call करता है। File पढ़ता है, API query करता है, command चलाता है, URL fetch करता है।
- Observe. वो tool का output पढ़ता है और decide करता है कि goal के करीब पहुंचा या नहीं।
- Iterate. अगर काम नहीं हुआ, अगला step plan करता है। अगर हो गया, report करता है।
Loop बस यही है। जो magic लोग agents को देते हैं वो बस है loop का साफ-सुथरा चलना जिसमें काफी useful tools connected हों। Loop नहीं, agent नहीं। एक model जो एक बार reply करे वो chatbot है। एक model जो loop चलाए, tools के साथ, goal की तरफ, वो agent है।

2026 में designer का agent toolkit
आपको agent scratch से build नहीं करना। April 2026 में, designers के लिए useful agent surface ऐसा दिखता है।
Claude Code. आपके terminal में या VS Code के अंदर रहता है। पूरा repo पढ़ता है। Files call करता है, commands चलाता है, MCP servers से बात करता है। हर उस चीज़ के लिए best जो code, tokens, या design system repo से जुड़ी हो।
Claude Desktop और ChatGPT with MCP. दोनों अब MCP connections support करते हैं। आप इन्हें Figma, Google Drive, Notion, Linear, और filesystem से wire कर सकते हैं। Research, briefs, spec writing, और content work के लिए coding से बेहतर।
Cursor agent mode. React, Vue, या Svelte में build करने के लिए editor-native agent। Claude Code जैसा ही काम करता है, terminal की जगह visual interface के साथ।
Figma MCP. खुद agent नहीं है। एक tool connector। यह Figma को एक data source बनाता है जिसे agent पढ़ सके। एक बार wire करें, हर MCP-aware agent अब आपके frames देख सकता है। Setup Figma MCP: Connecting Figma to Claude Code and AI Agents में cover है।
n8n, Zapier agents, और custom scripts. अगर आप चाहते हैं कि agent schedule पर चले या webhook पर react करे (नया Figma comment, नया Google Form submission, shared inbox में नई email), ये hosting platforms हैं। Designers इन्हें "glue" agents के लिए use करते हैं, वो जो background में चलते हैं जब आप सोते हैं।
ज़्यादातर designers के लिए सही starter stack है Claude Code plus Figma MCP plus एक connection Google Drive या Notion से। यह agentic design work के नब्बे percent के लिए काफी है।
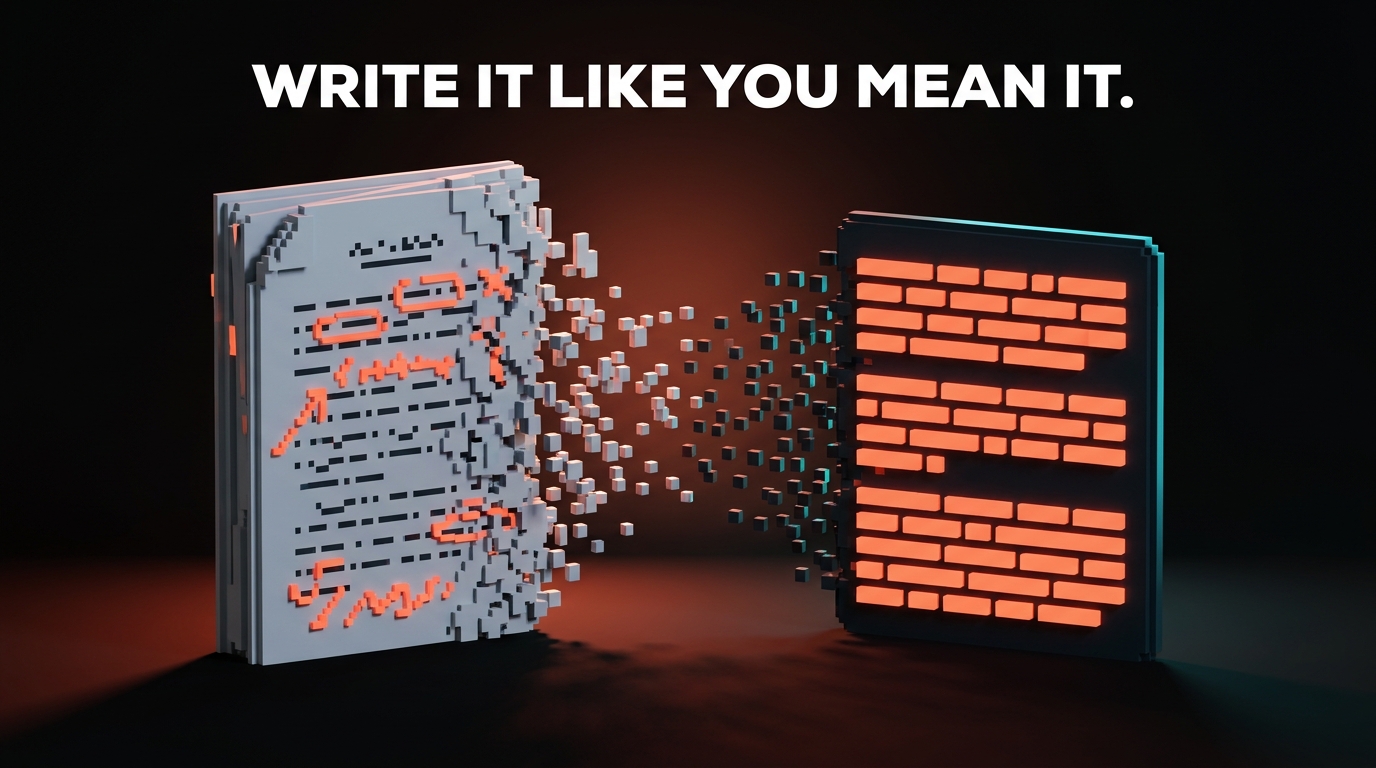
Agent को कैसे design करें (यह अभी भी एक brief है)
Agent design करना coding task नहीं है। यह briefing task है। वही जो आप हर बार करते हैं जब किसी freelancer या junior को काम देते हैं।
कुछ भी build करने से पहले, order में, चार सवालों के जवाब दें।
- Goal क्या है? एक sentence। "Client discovery call transcript से एक moodboard और एक short creative brief produce करें।"
- Agent को कौन से tools चाहिए? List बनाएं। "Google Doc पढ़ें, web search करें, images fetch करें, Figma file में लिखें, Google Drive folder में save करें।"
- कौन से rules उसे constrain करते हैं? "सिर्फ editorial sources से images लें, stock photography नहीं। कभी brand invent मत करो। हर source cite करो। Brief हमेशा हमारे house format में produce करो।"
- यह कब रुकता है? "जब Figma file में कम से कम 12 references के साथ एक moodboard frame हो और brief PDF के रूप में shared Drive में save हो।"
Goal miss करें, agent drift करेगा। Tools miss करें, वो गलत वाले से improvise करेगा। Rules miss करें, वो आपको अपने training data का average ship करेगा, जो usually stock और AI slop होता है। Stop condition miss करें, वो हमेशा loop करेगा या बहुत जल्दी रुक जाएगा।
यही shape है Prompt Engineering for Designers में cover किए गए five-part prompt की, multi-step work के लिए scale up।

Recipe 1: Research-to-moodboard agent
पहला agent जो हर design studio को build करना चाहिए। यह client discovery call transcript खाता है और पहला-pass moodboard plus एक short creative brief produce करता है।
Goal. Discovery call transcript से, Figma में एक moodboard और Google Drive में एक creative brief produce करें।
Tools needed. Google Drive MCP (transcript पढ़ें, brief लिखें), web search, image fetch, Figma MCP (moodboard frame में लिखें)।
System prompt shape. यह instruction आप agent को एक बार, session की शुरुआत में देते हैं।
You are a senior brand strategist at Brainy, a design studio with 2M+
community followers. Your job: turn a discovery call transcript into
a first-pass creative direction.

Goal:
- Read the transcript at the Google Drive URL I give you.
- Extract: client name, industry, audience, brand adjectives (3-5),
  competitors mentioned, any visual references they named.
- Produce two deliverables:
  1. A creative brief, saved as a Google Doc in /Brainy/Briefs/
     using our template at /Brainy/Templates/brief.docx.
  2. A Figma moodboard in the file I specify, populated with at
     least 12 editorial image references (no stock photography).

Rules:
- Use only editorial sources: Are.na, It's Nice That, Brand New,
  museum archives, design studio portfolios. Never Shutterstock,
  Getty, or Unsplash generic.
- Every image needs a source URL captioned on the Figma frame.
- Voice for the brief: Brainy house voice. Opinionated on craft,
  neutral on facts. No corporate filler.
- If the transcript is unclear on an adjective, flag it as "needs
  confirmation" in the brief instead of inventing one.

Stop when:
- Brief is saved, moodboard has 12+ captioned references, and you
  have posted the two URLs back to me.
यह एक working agent brief है। इसे Claude Desktop में paste करें Drive और Figma से MCP connections के साथ, किसी transcript पर point करें, और output review करें।
आप क्या review करते हैं। क्या adjectives सही हैं? क्या references on-brand हैं और obvious की तरफ drift नहीं कर रहे? क्या उसने actually हर image को source के साथ caption किया? क्या brief house voice में है या LinkedIn English पर revert हो गया?
Iteration. पहला run rough होगा। Agent ने जो miss किया उससे system prompt update करें। फिर run करें। तीन-चार cycles के बाद, agent ऐसे briefs ship करता है जिन्हें आप client-facing strategist को बिना rewrite के दे सकते हैं।
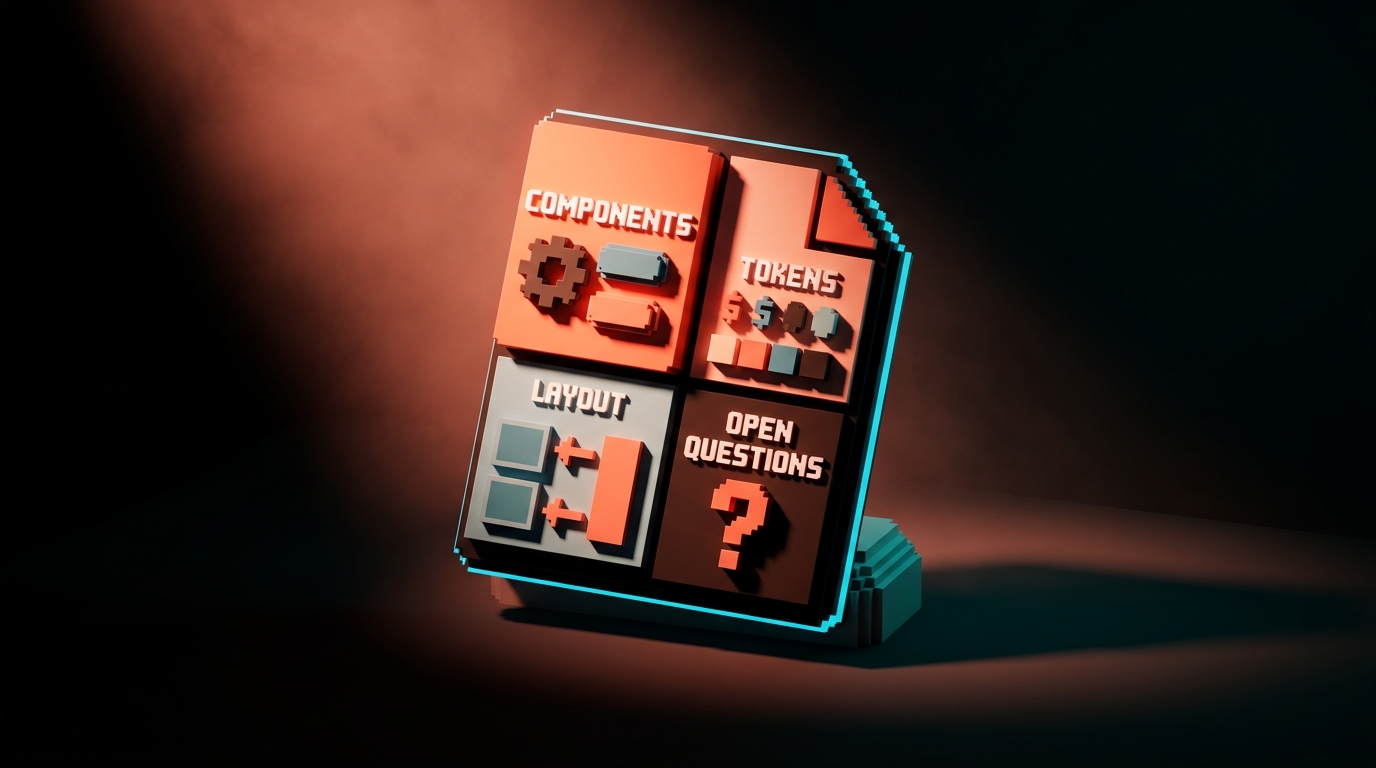
Recipe 2: Spec-to-handoff agent
यह agent "design approved है" और "dev के पास सब कुछ है" के बीच की gap बंद करता है। यह Figma file पढ़ता है और engineering handoff document लिखता है।
Goal. Figma file URL दिए जाने पर, developer handoff doc produce करें जिसमें component inventory, token list, spacing values, और open questions हों।
Tools needed. Figma MCP, output लिखने की जगह (Notion, GitHub issue, Google Doc, आपकी choice)।
System prompt shape.
You are a senior design systems engineer acting as the bridge
between a design team and a front-end team.

Goal:
- Read the Figma file at the URL I give you.
- Produce a handoff document containing:
  1. Component inventory: every component instance used, counted,
     with Figma component name and closest existing code component
     name from our /components/ directory.
  2. Token usage: every color, spacing, and typography variable
     referenced, compared against /design/tokens.css.
  3. Layout specs: breakpoints used, any auto-layout frames that
     might be ambiguous at edge cases.
  4. Open questions: a bulleted list of anything in the Figma file
     that cannot be resolved from the file alone (missing states,
     unclear interactions, content placeholders).
- Write the output as a Notion page in /Engineering/Handoffs/.

Rules:
- Never invent a component. If a Figma element does not map to an
  existing code component, list it under "new components required"
  with a one-line description.
- Flag every free-form (non auto-layout) frame as a risk.
- Include the Figma node ID for every item so devs can jump to it.
- Do not assume interactions that are not explicitly in the file.

Stop when:
- Notion page is written and you have posted the URL back to me.
यह recipe क्यों मायने रखती है। "Designer को लगा यह handoff हो गया, dev को tokens कभी मिले ही नहीं" वाली problem classic है। यह agent इसे हर feature के लिए लगभग नब्बे seconds में खत्म करता है।
कहां टूटता है। Figma files पर जो mess हों। Non auto-layout frames, inconsistent variable usage, random one-off components। Agent mess surface करता है, जो या तो gift है (अब आप जानते हैं) या problem (अब आपको fix करना होगा)।
Recipe 3: Design QA agent
वो agent जो deploy के बाद चलता है और बताता है कि क्या गलत ship हुआ।
Goal. एक deployed staging URL की Figma file of record से compare करें और visual drift report करें।
Tools needed. Figma MCP, Playwright (staging page के screenshots लेने के लिए), image comparison (Claude अपने vision mode में natively images diff कर सकता है)।
System prompt shape.
You are a senior product designer doing a pre-release visual QA pass.

Goal:
- Visit the staging URL I give you at three breakpoints: 1440px,
  768px, 375px.
- For each breakpoint, take a full-page screenshot using Playwright.
- Compare each screenshot to the corresponding Figma frame at the
  URL I provide.
- Produce a QA report listing every visual difference, categorized:
  - BLOCKING: wrong components, wrong colors, broken layouts
  - NON-BLOCKING: spacing off by less than 4px, minor type weight
    mismatches, image crops slightly different
  - INFORMATIONAL: intentional differences between design and code
    worth noting

Rules:
- Do not flag differences that are within 2px of intended spacing
  unless they visibly break alignment.
- Include a screenshot-with-annotation for every BLOCKING item.
- Link every item back to the Figma node ID.
- Output as a Markdown file in /qa/reports/ with timestamp.

Stop when:
- Report is saved and you have posted the path back to me.
यह recipe क्यों मायने रखती है। ज़्यादातर teams design QA manually करती हैं या करती ही नहीं। एक QA agent हर pre-prod deploy पर चलता है। वो 80% drift पकड़ता है जो eyes तीसरे page पर miss कर देती हैं।
Designers इसे कैसे use करते हैं। इसे CI में wire करें ताकि यह staging deploys पर automatically चले। या manual रखें और visually कुछ भी ship करने से पहले run करें। किसी भी तरह, आप "क्या यह सही ship हुआ" का bottleneck बनना बंद करते हैं।
Agents क्या नहीं कर सकते (अभी तक)
खुद से honest रहें। April 2026 में agents यहां fail करते हैं।
Taste decisions. Agent आपको एक competent moodboard ship करेगा। यह नहीं बता सकता कि moodboard emotionally flat है या brand को restraint पर और ज़ोर देना चाहिए। वो अभी भी आप हैं।
Ambiguous goals. "Site को better बनाओ" goal नहीं है। Agent loop करेगा या generic output produce करेगा। अगर आप goal को एक sentence में clear stop condition के साथ नहीं कह सकते, agent का कोई chance नहीं।
Novel strategy. Agents एक strategy execute करने में excellent हैं जो आपने define की हो। वो blank page से एक invent करने में poor हैं। Positioning, brand architecture, first-principles product calls अभी भी human work हैं।
Long-term judgment. Agent आपको बता सकता है "यह Button variant unused है।" यह नहीं बता सकता "हम एक pricing page launch करने वाले हैं जिसमें चौथा Button variant चाहिए होगा, इसलिए इसे delete मत करो।" Agent snapshot देखता है, roadmap नहीं।
कुछ भी जिसमें client या partner के साथ trust चाहिए। Client-facing strategist, freelancer को feedback दे रहा art director, idea pitch कर रहा creative director। Agents इन humans को assist करते हैं। Replace नहीं।
Rule: agents execution handle करते हैं। Humans taste, strategy, और trust handle करते हैं।
Agent user की तरह नहीं, agent designer की तरह सोचें
Agents use करने और उन्हें design करने में फर्क है। ज़्यादातर designers दोनों करेंगे।
Agent use करना prompt work है। Brief लिखना, output review करना, iterate करना।
Agent design करना system work है। आप goal define कर रहे हैं, tools चुन रहे हैं, constraints लिख रहे हैं, stop condition set कर रहे हैं, और एक feedback loop build कर रहे हैं ताकि agent समय के साथ बेहतर हो। यह एक prompt लिखने से ज़्यादा एक छोटी team run करने के करीब है।
तीन habits जो उन लोगों को अलग करती हैं जो अच्छे agents design करते हैं उनसे जो broken ones से लड़ते हैं।
एक, वो tool खोलने से पहले brief लिखते हैं। जब तक goal, tools, rules, और stop condition कागज़ पर न हों तब तक typing नहीं। एक घंटे की flailing बचती है।
दो, वो system prompt को code की तरह version करते हैं। इसे file में store करें। हो सके तो git में check in करें। जब भी agent नए तरीके से fail करे, एक rule add करें। Prompt समय के साथ smarter होता है, noisier नहीं।
तीन, वो पहले दस runs में हर run review करते हैं। Default से कोई trust नहीं। हर output पढ़ा जाता है, graded किया जाता है, और prompt update करने के लिए use किया जाता है। दस runs के बाद agent background में चलाने के लिए reliable है। दस runs से पहले नहीं।
अगर आप और AI workflow breakdowns चाहते हैं, Brainy Papers के बाकी हिस्से browse करें। अगर आप agentic workflows अपनी team में wire करना चाहते हैं बिना पहले तीन महीने fumbling के, Brainy hire करें और हम पूरा stack ship करेंगे।
Designer का agent starter plan
एक हफ्ता, एक agent, एक working loop।
- कोई एक workflow चुनें जो आप बार-बार करते हैं। Fantasy workflow नहीं। एक real workflow जो आपने इस महीने किया।
- एक-sentence goal, tool list, rules, और stop condition कागज़ पर लिखें।
- Claude Code या Claude Desktop set up करें एक MCP connection के साथ (Figma, Drive, या filesystem)।
- Brief को system prompt के रूप में paste करें। Real input पर agent run करें।
- Output critically पढ़ें। इसे grade करें उसके सामने जो आप खुद ship करते।
- जो fail हुआ उससे prompt update करें। फिर run करें।
- तीन से पांच बार दोहराएं। Note करें कि हर run में कितना time लगता है खुद करने के मुकाबले।
- Final system prompt save करें। यह है आपका पहला production agent।
यह एक बार करें और दूसरा agent आधे time में बनता है। चौथा agent एक afternoon में। आठवां agent schedule पर चलता है जब आप सोते हैं।
FAQ
AI agent build करने के लिए code करना ज़रूरी है?
नहीं। ऊपर हर recipe एक system prompt plus MCP connections के ज़रिए configure होती है, दोनों UI में या एक single command से set up होते हैं। आप briefs लिख रहे हैं और tools wire कर रहे हैं, production code नहीं लिख रहे। अगर आप Zapier configure कर सकते हैं, आप agent configure कर सकते हैं।
Claude Code और Claude agent में क्या फर्क है?
Claude Code एक specific agent है, वो जो आपके terminal में रहता है और codebases के साथ काम के लिए built है। "A Claude agent" कोई भी agent है जो Claude model से powered हो, जो Claude Code हो सकता है, Claude Desktop with tools, Anthropic API से built custom agent, या Claude को under the hood use करने वाला ChatGPT-style agent। Claude Code 2026 में designer-developer work के लिए flagship agent है।
Agent run करने में कितना खर्च होता है?
Individual designers के लिए, Claude Max subscription या ChatGPT Plus subscription respectively Claude Code और agent mode cover करती है। यह low hundreds of dollars per month में चलता है और ज़्यादातर tools include हैं जिनकी आपको ज़रूरत है। Teams के लिए, API usage उतना scale करता है जितना agents चलते हैं। Budget heavy use के लिए per designer per month लगभग $50 से $200 से शुरू होती है। जो time बचाता है उसके मुकाबले सस्ता।
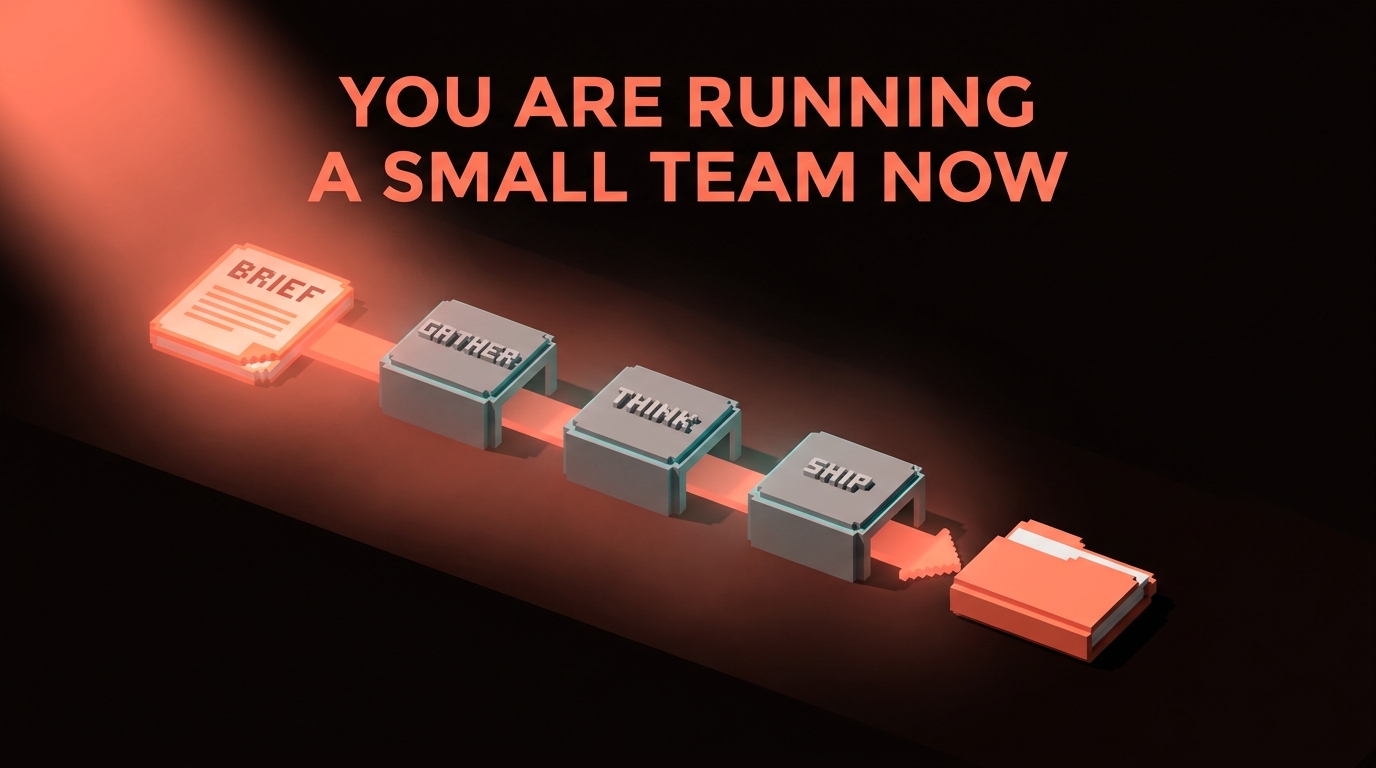
आप अब एक छोटी team run कर रहे हैं
आप designer थे। आपको briefs मिलते थे और आप काम produce करते थे। वो job का हिस्सा अभी भी है।
अब एक दूसरा हिस्सा है। आप agents की छोटी teams के लिए briefs लिखते हैं जो काम produce करती हैं जब आप पहला हिस्सा करते हैं। आप उनका output review करते हैं। जब वो drift करें तो correct करते हैं। जो agents अपना keep नहीं earn करते उन्हें retire करते हैं और जो करते हैं उन्हें promote करते हैं।
जो designers यह shift पहले समझेंगे वो इस decade के owner होंगे। इसलिए नहीं कि agents designers को replace कर रहे हैं, बल्कि इसलिए कि agents run करने वाले designers उन designers को replace कर रहे हैं जो नहीं करते।
एक workflow चुनें। Brief लिखें। पहला agent ship करें। Output review करें। सोमवार को फिर करें।
Want agentic workflows wired into your design team without the guesswork? Brainy ships the setup.
Get Started