AI Agents for Designers: How to Design and Build Agentic Workflows
What an AI agent actually is, how it differs from a chatbot or a copilot, and three agentic workflows any designer can build without writing production code.
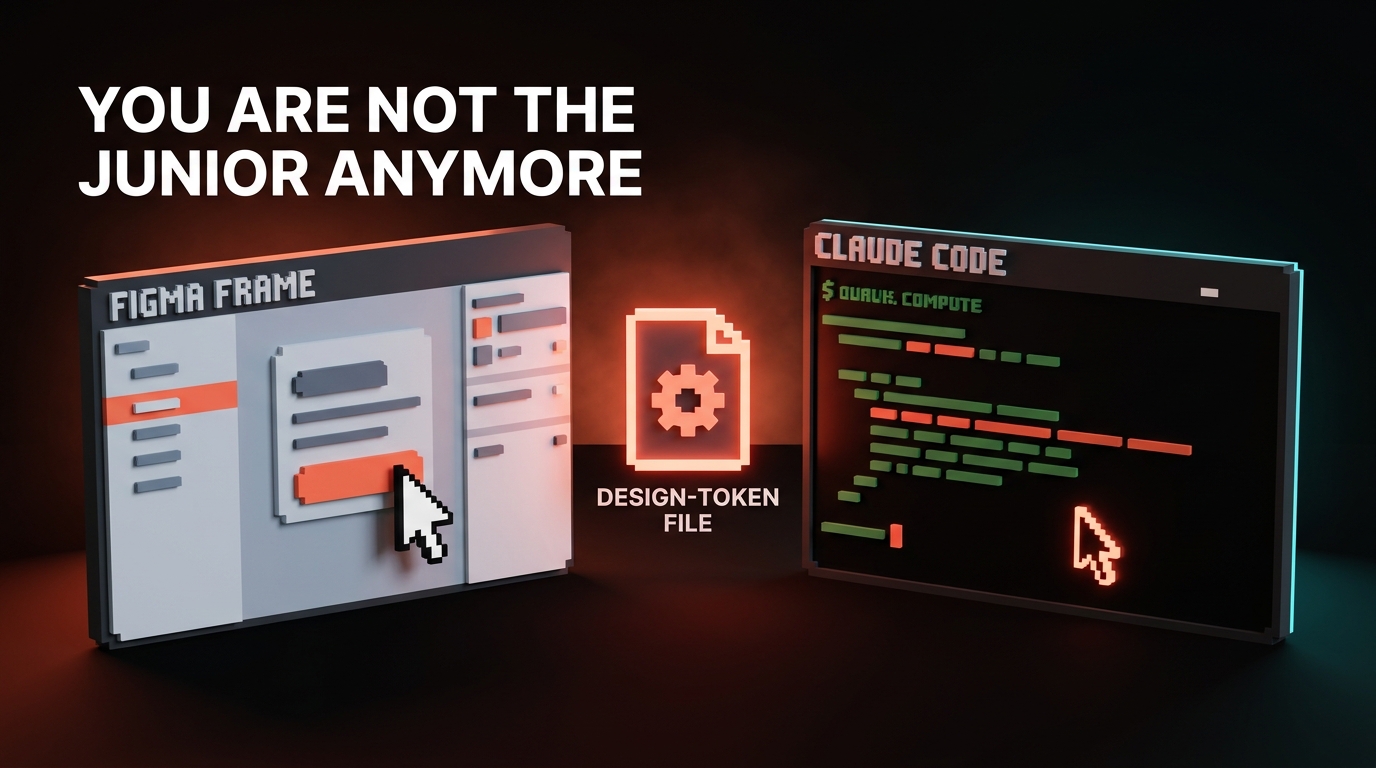
The difference between a chatbot and an agent is the difference between a junior who waits for your next message and a junior who goes and finishes the whole job.
That second version is what showed up in your tools sometime in the last eighteen months, and most designers still have not noticed. They are typing prompts into a chat window, copying the answer, pasting it into Figma, and wondering why their workflow feels like a slightly faster version of 2023. The agent shift is not "a better ChatGPT." It is a category change.
An agent gets a goal. It decides which tools to call. It calls them in order, reads the results, corrects course, and hands you a finished thing. You are not typing in a chat anymore. You are briefing a small team and reviewing the deliverable.
Chatbot, copilot, agent, and why the difference matters
Three words get used like they mean the same thing. They do not.
A chatbot is turn-based. You ask, it answers, you ask again. ChatGPT with no tools, Claude in a plain chat window, Gemini in the app. The context is whatever you paste. The output is text.
A copilot is inline assistance. GitHub Copilot, Figma's AI features, Notion AI. It lives inside another tool and suggests the next move while you work. It does not leave the lane you are in. It does not plan multi-step work.
An agent is goal-directed. You give it an outcome, not a next step. It picks its own tools, calls them in a loop, checks its own progress, and stops when the goal is met or it needs your input. The clearest modern example is Claude Code running in your terminal with MCP servers wired in, though ChatGPT's agent mode, Cursor's agent panel, and Anthropic's Computer Use all behave the same way.
| Mode | You say | It does | When it stops |
|---|---|---|---|
| Chatbot | "Write me a headline" | Returns text | After one message |
| Copilot | Start typing | Suggests the next line | When you reject it |
| Agent | "Audit our Button variants and propose a consolidated API" | Reads code, runs tests, writes a PR, asks questions | When the goal is done |
The takeaway: chatbots respond, copilots assist, agents deliver.
An agent is a loop, not a single prompt
Every agent you will ever use runs the same four-step cycle. Learn this shape and you can predict how any agentic tool will behave.
- Plan. The agent reads the goal and decides the first step.
- Act. It calls a tool. Reads a file, queries an API, runs a command, fetches a URL.
- Observe. It reads the tool's output and decides whether it got closer to the goal.
- Iterate. If not done, it plans the next step. If done, it reports back.
That loop is the whole thing. The magic people attribute to agents is just the loop running cleanly with enough useful tools connected. No loop, no agent. A model that replies once is a chatbot. A model that runs the loop, with tools, toward a goal, is an agent.

The designer's agent toolkit in 2026
You do not need to build an agent from scratch. In April 2026, the useful agent surface for designers looks like this.
Claude Code. Lives in your terminal or inside VS Code. Reads your whole repo. Calls files, runs commands, talks to MCP servers. Best for anything that touches code, tokens, or a design system repo.
Claude Desktop and ChatGPT with MCP. Both support MCP connections now. You can wire them to Figma, Google Drive, Notion, Linear, and your filesystem. Better for research, briefs, spec writing, and content work than for coding.
Cursor agent mode. Editor-native agent for building in React, Vue, or Svelte. Closer to Claude Code in what it does, with a visual interface instead of a terminal.
Figma MCP. Not an agent itself. A tool connector. It turns Figma into a data source an agent can read. Wire it in once, every MCP-aware agent can now see your frames. The setup is covered in Figma MCP: Connecting Figma to Claude Code and AI Agents.
n8n, Zapier agents, and custom scripts. If you want an agent that runs on a schedule or reacts to a webhook (new Figma comment, new Google Form submission, new email in a shared inbox), these are the hosting platforms. Designers use them for the "glue" agents, the ones that run in the background while you sleep.
For most designers, the right starter stack is Claude Code plus Figma MCP plus one connection to Google Drive or Notion. That is enough to cover ninety percent of agentic design work.
How to design an agent (it is still a brief)
Designing an agent is not a coding task. It is a briefing task. The same one you do every time you hand work to a freelancer or a junior.
Four questions to answer, in order, before you build anything.
- What is the goal? One sentence. "Produce a moodboard and a short creative brief from a client discovery call transcript."
- What tools does the agent need? List them. "Read a Google Doc, search the web, fetch images, write to a Figma file, save to a Google Drive folder."
- What rules constrain it? "Only pull images from editorial sources, not stock photography. Never invent a brand. Cite every source. Always produce the brief in our house format."
- When does it stop? "When the Figma file has a moodboard frame with at least 12 references and the brief is saved as a PDF in the shared Drive."
Miss the goal and the agent drifts. Miss the tools and it improvises with the wrong ones. Miss the rules and it ships you the average of its training data, which is usually stock and AI slop. Miss the stop condition and it loops forever or stops too early.
This is the same shape as the five-part prompt covered in Prompt Engineering for Designers, scaled up for multi-step work.

Recipe 1: The research-to-moodboard agent
The first agent every design studio should build. It eats a client discovery call transcript and produces a first-pass moodboard plus a short creative brief.
Goal. From a discovery call transcript, produce a moodboard in Figma and a creative brief in Google Drive.
Tools needed. Google Drive MCP (read transcript, write brief), web search, image fetch, Figma MCP (write to a moodboard frame).
System prompt shape. This is the instruction you give the agent once, at the start of the session.
You are a senior brand strategist at Brainy, a design studio with 2M+
community followers. Your job: turn a discovery call transcript into
a first-pass creative direction.

Goal:
- Read the transcript at the Google Drive URL I give you.
- Extract: client name, industry, audience, brand adjectives (3-5),
  competitors mentioned, any visual references they named.
- Produce two deliverables:
  1. A creative brief, saved as a Google Doc in /Brainy/Briefs/
     using our template at /Brainy/Templates/brief.docx.
  2. A Figma moodboard in the file I specify, populated with at
     least 12 editorial image references (no stock photography).

Rules:
- Use only editorial sources: Are.na, It's Nice That, Brand New,
  museum archives, design studio portfolios. Never Shutterstock,
  Getty, or Unsplash generic.
- Every image needs a source URL captioned on the Figma frame.
- Voice for the brief: Brainy house voice. Opinionated on craft,
  neutral on facts. No corporate filler.
- If the transcript is unclear on an adjective, flag it as "needs
  confirmation" in the brief instead of inventing one.

Stop when:
- Brief is saved, moodboard has 12+ captioned references, and you
  have posted the two URLs back to me.
That is a working agent brief. Paste it into Claude Desktop with MCP connections to Drive and Figma, point it at a transcript, and review the output.
What you review. Are the adjectives right? Are the references on-brand and not drifting toward the obvious? Did it actually caption every image with a source? Is the brief in house voice or did it revert to LinkedIn English?
Iteration. First run will be rough. Update the system prompt with what the agent missed. Run it again. After three or four cycles, the agent ships briefs you can hand to a client-facing strategist without rewriting.
Recipe 2: The spec-to-handoff agent
This agent closes the gap between "design is approved" and "dev has everything they need." It reads a Figma file and writes the engineering handoff document.
Goal. Given a Figma file URL, produce a developer handoff doc with component inventory, token list, spacing values, and open questions.
Tools needed. Figma MCP, a place to write the output (Notion, GitHub issue, Google Doc, your choice).
System prompt shape.
You are a senior design systems engineer acting as the bridge
between a design team and a front-end team.

Goal:
- Read the Figma file at the URL I give you.
- Produce a handoff document containing:
  1. Component inventory: every component instance used, counted,
     with Figma component name and closest existing code component
     name from our /components/ directory.
  2. Token usage: every color, spacing, and typography variable
     referenced, compared against /design/tokens.css.
  3. Layout specs: breakpoints used, any auto-layout frames that
     might be ambiguous at edge cases.
  4. Open questions: a bulleted list of anything in the Figma file
     that cannot be resolved from the file alone (missing states,
     unclear interactions, content placeholders).
- Write the output as a Notion page in /Engineering/Handoffs/.

Rules:
- Never invent a component. If a Figma element does not map to an
  existing code component, list it under "new components required"
  with a one-line description.
- Flag every free-form (non auto-layout) frame as a risk.
- Include the Figma node ID for every item so devs can jump to it.
- Do not assume interactions that are not explicitly in the file.

Stop when:
- Notion page is written and you have posted the URL back to me.
Why this recipe matters. The "designer thought this was handed off, dev never found the tokens" problem is a classic. This agent eliminates it in about ninety seconds per feature.
Where it breaks. On Figma files that are a mess. Non auto-layout frames, inconsistent variable usage, random one-off components. The agent surfaces the mess, which is either a gift (now you know) or a problem (now you have to fix it).

Recipe 3: The design QA agent
The agent that runs after a deploy and tells you what shipped wrong.
Goal. Compare a deployed staging URL to the Figma file of record and report visual drift.
Tools needed. Figma MCP, Playwright (for taking screenshots of the staging page), image comparison (Claude can diff images natively in its vision mode).
System prompt shape.
You are a senior [product designer](/paper/glossary/product-designer) doing a pre-release [visual QA](/paper/glossary/visual-qa) pass.

Goal:
- Visit the staging URL I give you at three breakpoints: 1440px,
  768px, 375px.
- For each breakpoint, take a full-page screenshot using Playwright.
- Compare each screenshot to the corresponding Figma frame at the
  URL I provide.
- Produce a QA report listing every visual difference, categorized:
  - BLOCKING: wrong components, wrong colors, broken layouts
  - NON-BLOCKING: spacing off by less than 4px, minor type weight
    mismatches, image crops slightly different
  - INFORMATIONAL: intentional differences between design and code
    worth noting

Rules:
- Do not flag differences that are within 2px of intended spacing
  unless they visibly break alignment.
- Include a screenshot-with-annotation for every BLOCKING item.
- Link every item back to the Figma node ID.
- Output as a Markdown file in /qa/reports/ with timestamp.

Stop when:
- Report is saved and you have posted the path back to me.
Why this recipe matters. Most teams do design QA manually or not at all. A QA agent runs on every pre-prod deploy. It catches the 80% of drift that eyes miss on the third page.
How designers use it. Wire it into CI so it runs automatically on staging deploys. Or keep it manual and run it before shipping anything visible. Either way, you stop being the bottleneck on "did this ship right."
What agents cannot do (yet)
Be honest with yourself. Here is where agents fail in April 2026.
Taste decisions. The agent will ship you a competent moodboard. It cannot tell you the moodboard is emotionally flat or that the brand should go harder on restraint. That is still you.
Ambiguous goals. "Make the site better" is not a goal. The agent loops or produces generic output. If you cannot state the goal in one sentence with a clear stop condition, the agent has no chance.
Novel strategy. Agents are excellent at executing a strategy you have defined. They are poor at inventing one from a blank page. Positioning, brand architecture, first-principles product calls are still human work.
Long-term judgment. An agent can tell you "this Button variant is unused." It cannot tell you "we are about to launch a pricing page that will need a fourth Button variant, so do not delete it." The agent sees the snapshot, not the roadmap.
Anything that needs trust with a client or partner. A client-facing strategist, an art director giving feedback to a freelancer, a creative director pitching an idea. Agents assist these humans. They do not replace them.
The rule: agents handle the execution. Humans handle the taste, the strategy, and the trust.
How to think like an agent designer, not an agent user
There is a difference between using agents and designing them. Most designers will end up doing both.
Using an agent is prompt work. Writing a brief, reviewing the output, iterating.
Designing an agent is system work. You are defining the goal, picking the tools, writing the constraints, setting the stop condition, and building a feedback loop so the agent gets better over time. It is closer to running a small team than to writing a prompt.
Three habits that separate people who design good agents from people who fight with broken ones.
One, they write the brief before they open the tool. No typing until the goal, tools, rules, and stop condition are on paper. Saves an hour of flailing.
Two, they version the system prompt like code. Store it in a file. Check it into git if you can. Every time the agent fails in a new way, you add a rule. The prompt gets smarter over time, not noisier.
Three, they review every run for the first ten runs. No trust by default. Every output gets read, graded, and used to update the prompt. After ten runs the agent is reliable enough to run in the background. Before ten runs it is not.
If you want more AI workflow breakdowns, browse the rest of Brainy Papers. If you want agentic workflows wired into your team without the first three months of fumbling, hire Brainy and we will ship the whole stack.
The designer's agent starter plan
One week, one agent, one working loop.
- Pick one workflow you do repeatedly. Not a fantasy workflow. A real one you did this month.
- Write the one-sentence goal, the tool list, the rules, and the stop condition on paper.
- Set up Claude Code or Claude Desktop with one MCP connection (Figma, Drive, or filesystem).
- Paste the brief as a system prompt. Run the agent on a real input.
- Read the output critically. Grade it against what you would have shipped.
- Update the prompt with what failed. Run again.
- Repeat three to five times. Note how much time each run takes compared to doing it yourself.
- Save the final system prompt. That is your first production agent.
Do that once and the second agent takes half the time. The fourth agent takes an afternoon. The eighth agent runs on a schedule while you sleep.
FAQ
Do I need to code to build an AI agent?
No. Every recipe above is configured through a system prompt plus MCP connections, both of which are set up in a UI or a single command. You are writing briefs and wiring tools, not writing production code. If you can configure Zapier, you can configure an agent.
What is the difference between Claude Code and a Claude agent?
Claude Code is one specific agent, the one that lives in your terminal and is built for working with codebases. "A Claude agent" is any agent powered by the Claude model, which could be Claude Code, Claude Desktop with tools, a custom agent built through the Anthropic API, or a ChatGPT-style agent using Claude under the hood. Claude Code is the flagship agent for designer-developer work in 2026.
How much does it cost to run an agent?
For individual designers, a Claude Max subscription or a ChatGPT Plus subscription covers Claude Code and agent mode respectively. That runs in the low hundreds of dollars per month and includes most of the tools you need. For teams, API usage scales with how much the agents run. Budget starts around $50 to $200 per designer per month for heavy use. Cheap compared to the time it saves.
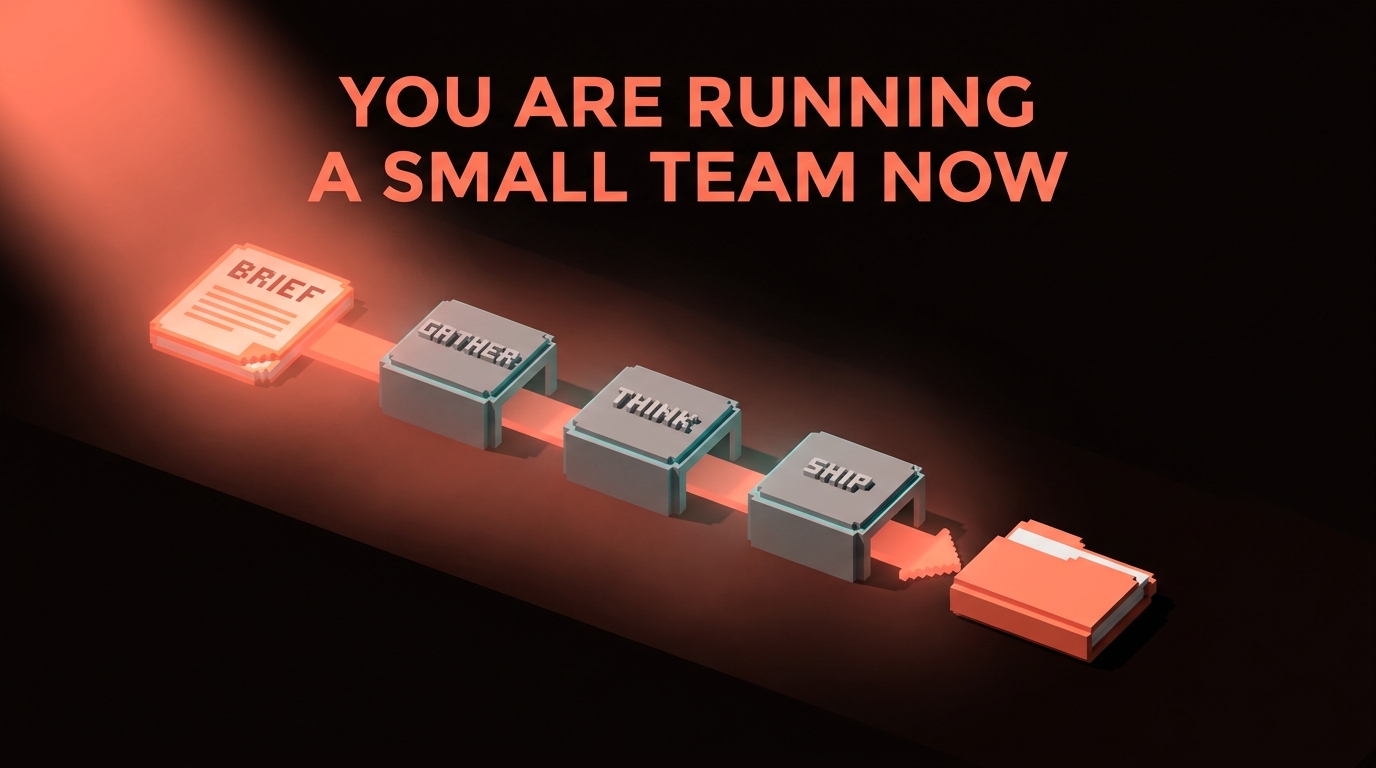
You are running a small team now
You used to be a designer. You were given briefs and you produced work. That is still part of the job.
Now there is a second part. You write briefs for small teams of agents that produce work while you do the first part. You review their output. You correct them when they drift. You retire the agents that do not earn their keep and you promote the ones that do.
The designers who get this shift first are going to own the decade. Not because agents are replacing designers, but because designers who run agents are replacing designers who do not.
Pick a workflow. Write the brief. Ship the first agent. Review the output. Do it again on Monday.
Want agentic workflows wired into your design team without the guesswork? Brainy ships the setup.
Get StartedNot ready to hire? Run the free Business Genome, an 11-dimension diagnostic for your venture.
Get your free GenomeGet new papers by email
New Brainy papers in your inbox. Confirm once, unsubscribe anytime.