Screenshot-Driven Design: The New Reference Workflow
Designers stopped opening Pinterest. They open a screenshot, paste it into AI, and design from real reference. The full screenshot-driven design playbook.
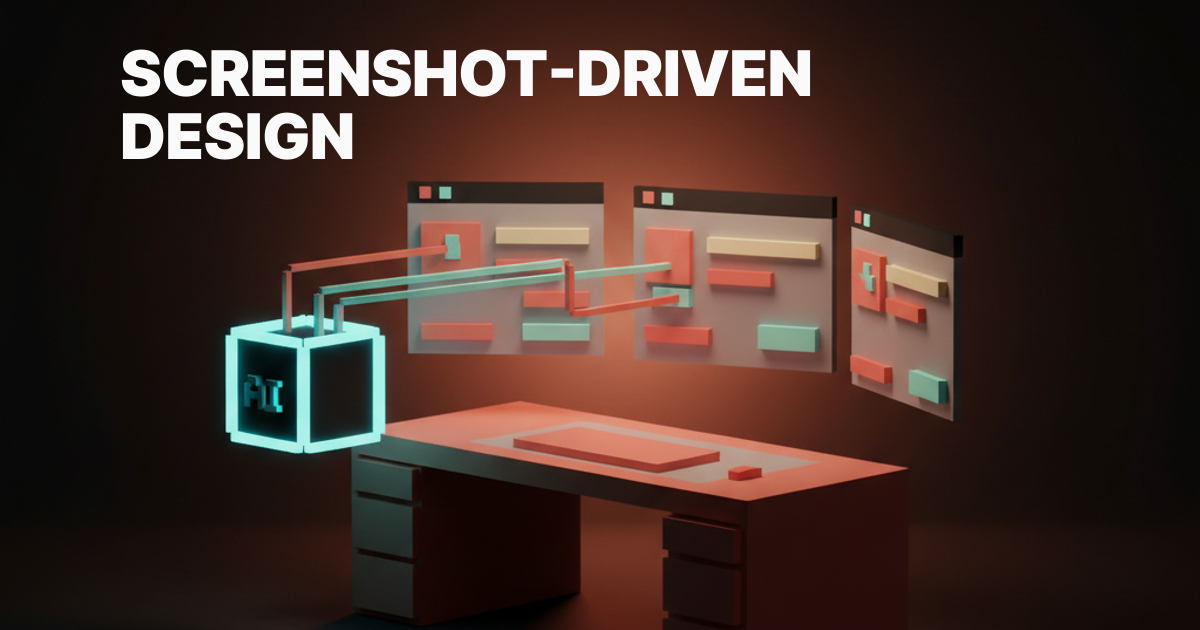
Designers stopped opening Pinterest a year ago. They open a screenshot instead. Then they paste it into AI. That single move, screenshot to model, is the new front door of product design.
Almost nobody has bothered to name it. This paper names it. Screenshot-driven design. It is the workflow that already runs through every fast product team in 2026.
It has quietly replaced moodboards, wireframes, and most of what used to live on a designer's Figma reference page. The screenshot is now the universal language between humans and models. We are going to walk through what it is, why it works now, the toolkit, the methodology, and the workshop you can run today.
What screenshot-driven design actually is
Screenshot-driven design is the practice of starting every design task from a captured image of a real product, not a wireframe and not a moodboard. You capture the screen of something that works. You feed it to an AI tool. You let the model name the patterns, extract the tokens, and produce a first cut that you push further.
The screenshot is the spec, the brief, and the prompt all at once. The shape of the work changed. The old loop was sketch, wireframe, hi-fi, prototype, hand-off. The new loop is capture, caption, prompt, iterate, ship.
Five steps, four of them faster than they used to be. The first one happens in your browser while you scroll. Nothing about this is theoretical. Open any active design team's Slack and you will see screenshots flying around with the speed Pinterest pins used to.
The reason this matters is speed of intent. A wireframe communicates intent at low fidelity and slow speed. A moodboard communicates vibe but not structure. A screenshot communicates intent, structure, tone, hierarchy, spacing, color, and motion in the single act of selecting a region of pixels.
Every other artifact in the design process is a lossy compression of what a screenshot already shows.
Why it works now and not in 2023
Two things had to mature before this workflow could exist. AI vision had to get good enough to parse a real product screenshot and reason about it like a designer would. And the everyday capture tools had to make grabbing a clean reference image so cheap that you do it without thinking. Both happened in the last twenty months.
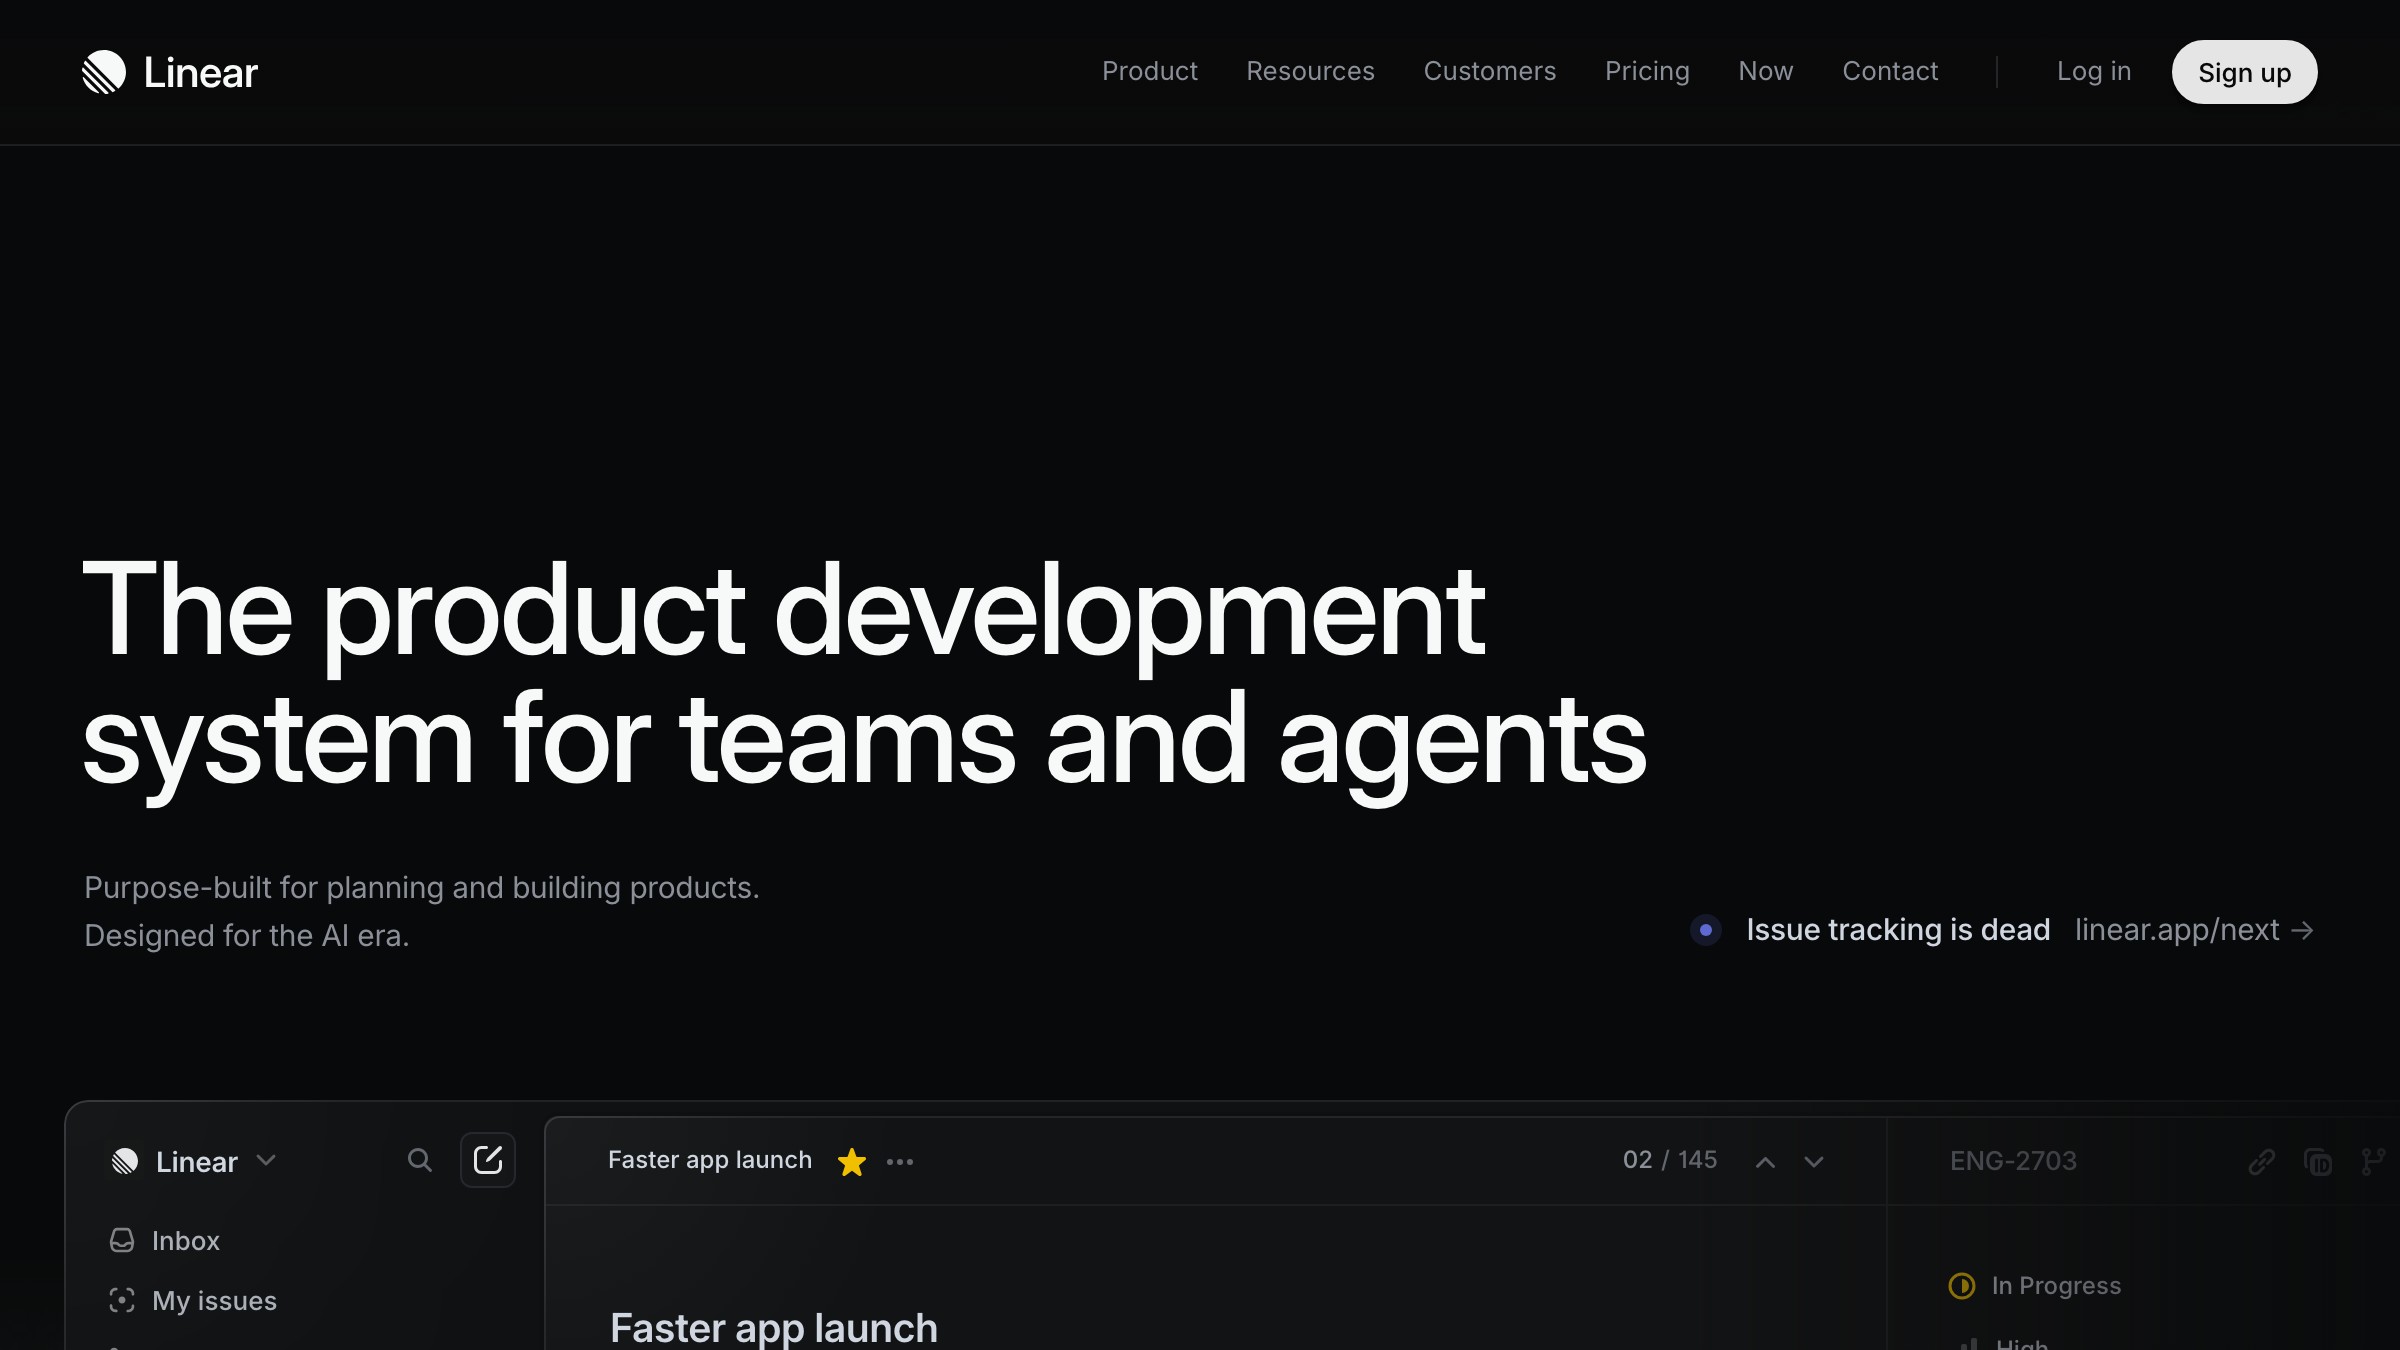
Claude's vision, GPT's vision, and Gemini's vision all crossed the same line in 2025. They went from describing what is in an image to reasoning about why it is there. A model that can look at the Linear marketing site and tell you the hero uses a single thick weight on the H1, a desaturated brand color, a sub-grid alignment for the secondary illustration, and a specific motion delay on the supporting copy is a model that can be a design collaborator. Not a fancy alt-text generator.
The capture side closed the loop. CleanShot X turned screenshots into a first-class asset with annotation, sharing, and OCR baked in. Raycast added a system-wide capture surface that lives one keystroke away from anything you do.
Arc made the entire web a screenshot waiting to happen. And Playwright, the headless browser tool engineers use to test web apps, quietly became the cheat code that lets designers capture any page on the internet at any size, automated, repeatable, on demand. Together those tools turned reference research from a chore into a reflex.
The five things screenshots beat moodboards at
A moodboard is a vibe document. A screenshot is a working specification. The gap between those two things is the entire argument for changing how you do reference research, and it shows up in five specific places.
- Structure. A moodboard hides hierarchy behind aesthetic. A screenshot exposes it.
- Fidelity. A moodboard sits at sixty percent. A screenshot ships at one hundred.
- Specificity. A moodboard says cozy. A screenshot says fourteen pixel line height on a sixteen pixel body in Inter at four hundred fifty weight.
- Promptability. A moodboard is a stack of inspirations a model cannot reason about. A screenshot is one image a model can disassemble in seconds.
- Iteration speed. A moodboard takes a day. A screenshot library takes thirty seconds and lives in your clipboard.
The last point is the one that matters most for working teams. Iteration speed compounds. A team that can capture, caption, and re-prompt in under five minutes will out-design a team that runs moodboard reviews twice a week.
That holds even if the moodboard team has better individual taste. Volume of cycles beats quality of artifacts at the front of every design problem.
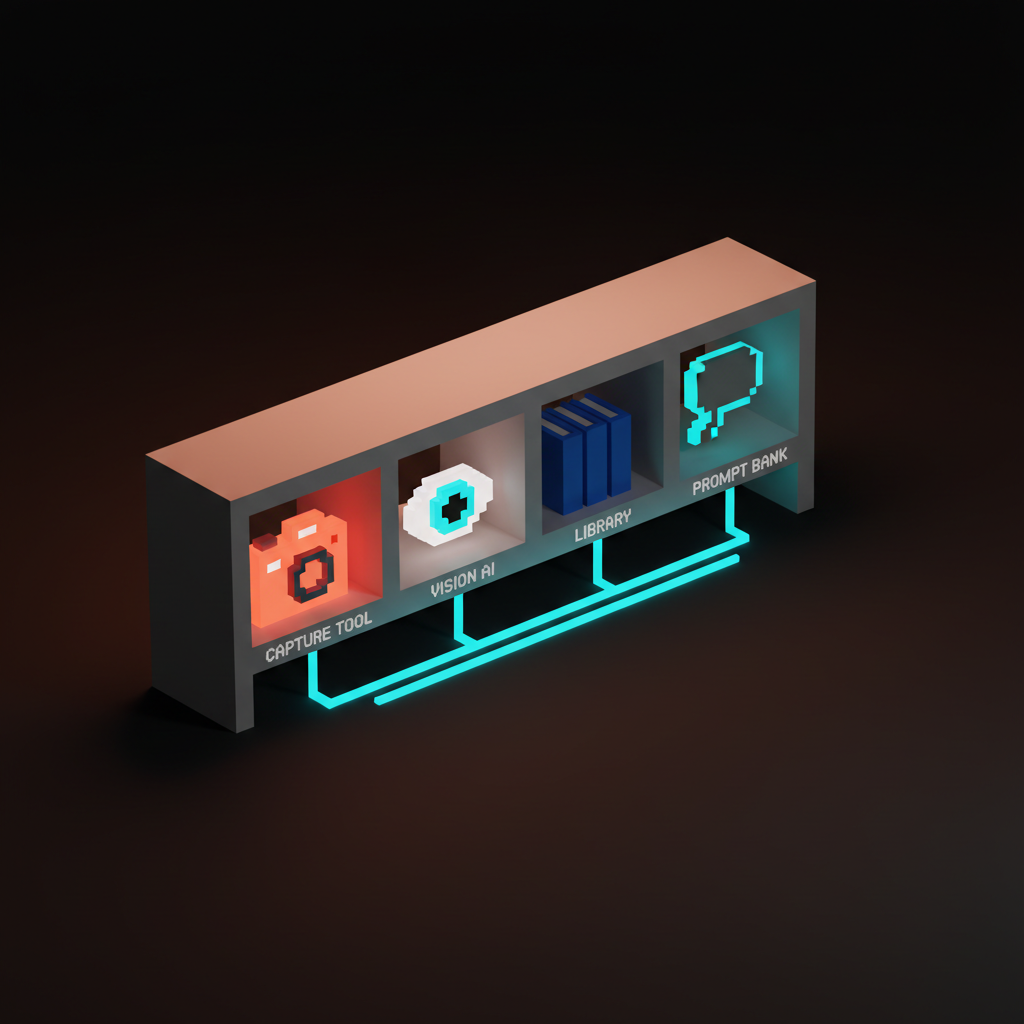
The capture stack every designer ships in 2026
The capture side of the workflow is the boring half. It is also the half most teams get wrong because they treat it as native screenshots and move on. Native screenshots are fine for casual use. The screenshot-driven workflow needs a capture stack that is faster, cleaner, more annotatable, and more repeatable than what ships with the OS.
CleanShot X is the macOS standard. It does scrolling captures, region capture with snap-to-element, video, OCR, and a clipboard history that is a design library in disguise. Raycast Window Capture pairs with it for whole-window grabs that respect the active app.
Arc's ask-the-page feature lets you ask a question of any tab and screenshot the answer in the same surface. ShareX covers the same territory on Windows. Shottr is the lightweight CleanShot alternative for designers who want less software and more keyboard.
Then there is the underrated category, the tools that turn the web itself into a capture target. Screenshot.rocks renders any URL at any device size with a frame. Browserless and ScreenshotOne run the same job at API scale. Google Lens lets you screenshot the real world and pull design references out of the physical environment.
The capture stack is not one tool. It is a small set of tools, each best at one slice of the capture problem, glued together by the muscle memory of the designer who installed them.
Playwright is a designer tool now
The single most underused capture tool in design in 2026 is Playwright, and it is not a design tool. It is the testing library that engineers use to automate browsers. The reason it belongs in a designer's stack is simple.
With six lines of code, Playwright will open any site on the internet, set any viewport, wait for the network to settle, scroll to any position, and save a pixel-perfect screenshot. Then it will do it again next week so you can watch the design evolve.
The use cases are obvious once you see them. Build a competitor watch list and let Playwright capture the front pages of forty competitors every Monday. Build a pattern library by capturing the same component, the pricing table, the empty state, the onboarding modal, across thirty products and pasting all thirty into a single Figma frame.
Capture marketing pages at 1200x675 for share images, at 375x812 for mobile, at 1920x1080 for design reviews, in the same script.
Designers who learned to write a Playwright script in an afternoon report the same thing. The reference research that used to take three hours of clicking and snipping now takes thirty seconds of running a script. That is not a productivity improvement. That is a different job.
The vision stack that reads the screenshots
A screenshot is only as useful as the model that can read it. The vision stack is the second half of screenshot-driven design, and the choices here are not interchangeable. Different models have different strengths, and a working designer learns which model to feed which kind of screenshot.
Cursor's image input is the cleanest path for design-to-code work. Drag a screenshot into the chat, ask Cursor to rebuild it as a React component or a Tailwind layout, and watch it produce code that respects the structure of the reference.
Claude's vision is the strongest at reasoning about typography, spacing, and hierarchy. Paste a screenshot in and ask Claude to describe the design system in operation. The answer is often more useful than a real audit, because Claude has no incentive to be polite about the gaps.
V0 is the image-to-code workhorse for shadcn and Next.js teams. Drop a screenshot in, get a working component, iterate in the same surface. ChatGPT's vision is the generalist.
Gemini's vision wins on long context, useful when you want to paste twelve screenshots from twelve competitors and ask for the patterns. Google Lens is the only vision tool that handles the physical world cleanly, useful for designers who pull reference from print, architecture, and product photography.
The four-step methodology
Capture, caption, classify, recombine. Four steps, in that order, every time. The methodology is not optional.
Teams that skip the captioning step end up with a screenshot library they cannot search. Teams that skip classification end up with a library they cannot trust. Teams that skip recombination end up copying instead of designing. Each step has a purpose and each one compounds.
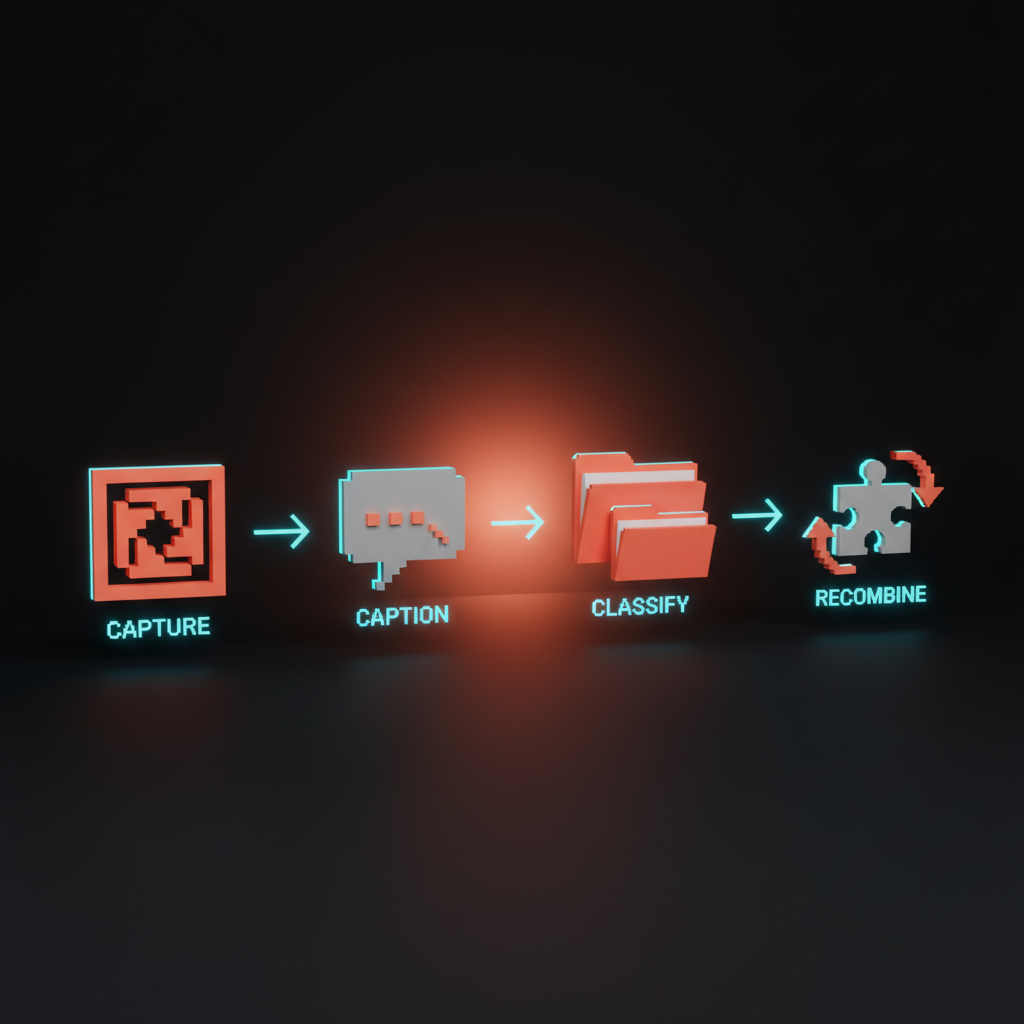
Capture is the boring discipline. Use the same tool, the same naming convention, the same viewport, and the same crop rules every time, so that future you and future AI can both reason about the library.
Caption is where most designers add the edge they are missing. Every screenshot gets one sentence of text written by you, not by the model, describing what you are saving and why. The why is the part that makes the library searchable.
Classify is the work of assigning every screenshot to a small set of categories that match how you actually design. Layout, type, color, motion, empty state, hero, pricing, footer, onboarding. Pick fifteen and stick with them.
Recombine is the only step that produces work. You pull three to five screenshots out of the library, paste them into an AI tool together, and ask the model to synthesize something new from the combination. The synthesis is yours. The reference is theirs.
How to use a screenshot inside a spec
The single biggest force multiplier of screenshot-driven design is using screenshots inside the spec itself. A traditional spec is a Notion page with words, links, and maybe a Figma embed.
A screenshot-driven spec is a Notion page where every section opens with the reference screenshot, includes the caption you wrote, and ends with the AI-generated breakdown of the pattern. The screenshot does the work words used to do.
The template is short. For every component or screen the spec covers, include the inspiration screenshot, the AI breakdown of the inspiration, the constraint list, the variation rules, and the link to the captured Playwright script that will refresh the screenshot next month.
The constraint list is the only thing the designer writes in their own voice. Everything else is reference plus model output, organized. The benefit shows up in handoff. Engineers no longer guess what the spec means.
They click the screenshot, see the source, read the breakdown, and ship code that matches the intent because the intent is visible. The tone is the screenshot. The screenshot is the spec. The spec is the build order.
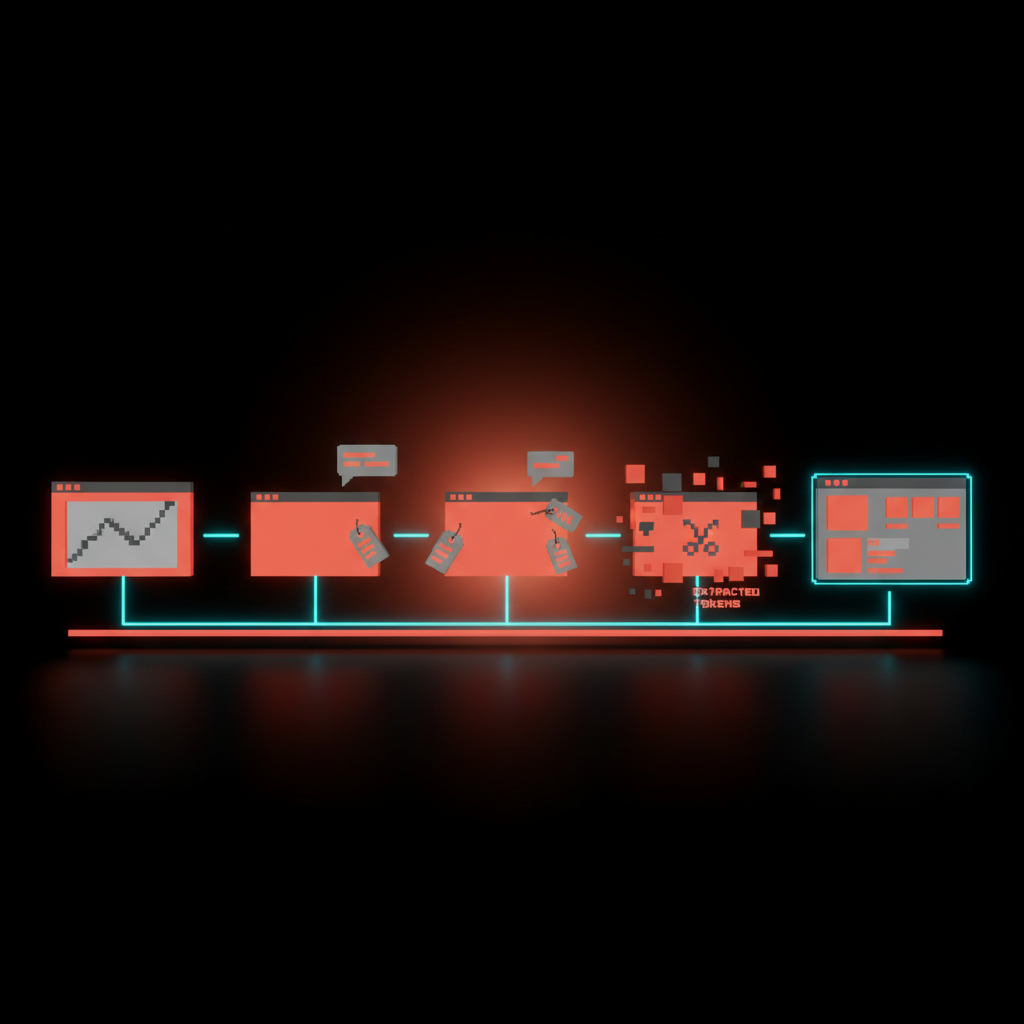
How to extract design tokens from a screenshot
Design tokens used to come from a Figma library and a long conversation between design and engineering. In 2026, the fastest path to a working token set is to paste a screenshot into an AI tool and ask for it.
The model will give you the color values, the spacing scale, the type ramp, the radii, and the shadow stack, and it will be ninety percent right out of the gate. The other ten percent is your taste.
The prompt is what makes it work. You do not ask the model to extract tokens. You ask the model to look at the screenshot and produce a JSON object with named token categories, sensible defaults, and a confidence score per category, plus a one-line rationale for each value.
The structure forces the model to be specific. The confidence score lets you triage which tokens are worth a closer look. The rationale lets you correct the model when it is wrong.
The output goes straight into the design tools that consume tokens. Style Dictionary, Figma Tokens, Tailwind config. The same JSON object can drive all three. A screenshot-driven design team can go from a single reference screenshot to a working token export in under fifteen minutes.
How to organize a personal screenshot library
A screenshot library is a knowledge asset, and like every knowledge asset it is worth nothing if it is not organized. The two failure modes are equally bad. A flat folder with three thousand untitled PNGs is a dump.
A deeply nested taxonomy with sixty categories is a maze. The right shape is shallow, named, and captioned, and it lives in a place you can search from anywhere.
The library that works for most designers has three levels. The top level is a single folder per source product, named after the product. Inside each product folder, screenshots are named with a pattern that includes the date, the page, and the component.
Every screenshot has a sidecar caption in the same folder, written as a simple text file, holding the one sentence about why you saved it. Three levels. Two files per screenshot. No more.
Storage is the easy part. iCloud Drive, Dropbox, Notion, or a local folder synced to a cloud service all work. The trick is making the library findable from your AI tools, which means putting it somewhere your editor can reach.
Cursor can read a local folder. Claude can be pointed at a Drive. The library is only as good as the model's ability to read it on demand, and that is a setup decision worth getting right early.
Study, do not steal
The hardest part of screenshot-driven design is the line between studying a reference and copying it. The workflow makes it terrifyingly easy to do either, and the difference between the two is the difference between a designer and a content thief.
The line is not legal. It is craft. And craft is what separates a team that ships its own product from a team that ships someone else's product with the colors changed.
The rule is simple. A screenshot is study material, not source material. You can capture, caption, classify, and reference any public product. You cannot paste the screenshot into v0, accept the output verbatim, and ship it as your own.
The synthesis step in the methodology exists specifically to make sure you are pulling patterns, not pixels. If your work could be confused with the reference, you skipped the recombine.
The legal floor matters too. Trade dress, copyrighted illustrations, brand marks, and protected layouts are protected for a reason. Lifting them is theft regardless of how easy AI made it.
The good news is that the methodology, capture caption classify recombine, makes infringement nearly impossible by design. If you are doing the workflow correctly, the original is in your library and your output is in your product, and there is enough distance between the two that nobody can confuse them.
The workshop you can run today
The fastest way to install screenshot-driven design inside a team is a single ninety-minute workshop that walks the room through the full loop on a real product. Pick a feature your team is shipping next month. Open the slot in the calendar this week.
Bring the laptops, the capture tools, and one AI surface everyone has access to. Run the room through these steps in order.
- Spend fifteen minutes capturing references. Each person captures five screenshots of products that solve a similar problem to the feature.
- Spend ten minutes captioning. Each person writes one sentence per screenshot describing the pattern.
- Spend twenty minutes prompting. Each person pastes their five screenshots into the AI surface and asks for a synthesis brief.
- Spend twenty minutes designing. Each person produces a first cut of the feature using the synthesis brief.
- Spend fifteen minutes reviewing. The room compares the first cuts side by side.
- Spend ten minutes documenting. The team writes down the rules they discovered for their own version of the workflow.
The output is two things. A working first cut of the feature, which is useful in its own right, and a written house style for screenshot-driven design that the team can use on every project after this one. The workshop is not a one-time exercise. It is the on-ramp to a new operating mode.
| Workflow | Speed | Fidelity | Promptable to AI | Best for |
|---|---|---|---|---|
| Moodboard-driven | Slow | Low | Poor | Brand direction, early ideation |
| Wireframe-driven | Mid | Mid | Mid | Structure, flow, accessibility |
| Screenshot-driven | Fast | High | Excellent | Product design, AI-augmented teams |
Where this is heading
Screenshot-driven design is not a final state. It is a transitional one. The endpoint is a world where the screenshot itself disappears and the reference becomes a live, queryable representation of any product on the internet, available to a designer's AI tools the way Figma libraries are available today.
Playwright is already showing us the shape of that endpoint. The screenshots it produces are not snapshots. They are the first frame of a feed that any product team can subscribe to.
The next twelve months will see the screenshot library move from folders to vector databases, from manual captions to automated tags, and from drag-and-drop into AI tools to native queries inside the design surface. The designers who get ahead of this curve are the ones building the muscle now, with a capture stack, a captioned library, and the prompt patterns that turn an image into a design decision.
The methodology will outlive the tools. The bigger shift is what it does to taste. When every designer can reach for every reference in the world in seconds, the differentiator stops being access and starts being judgment.
Knowing which screenshots to save. Knowing which patterns to combine. Knowing when the model is wrong about a pattern and you are right. The screenshot is the new sketchbook, and the judgment is still yours.
Want help installing a screenshot-driven design system inside your team, with the capture stack, the prompt library, and the spec templates wired in? Brainy ships the workflow as a sprint, not a slide deck.
Get StartedNot ready to hire? Run the free Business Genome, an 11-dimension diagnostic for your venture.
Get your free GenomeGet new papers by email
New Brainy papers in your inbox. Confirm once, unsubscribe anytime.